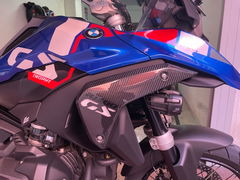

• Garagela tua moto e solo gli accessori compatibili
  • −5%Benvenuto nel Garage5% off for those who save the motorcycle in the app, until 12/31/2026
  • Cerca con una fotol'app riconosce la tua moto
  • Diario mototagliando, revisione, bollo
  • Avvisaminotifica quando un prodotto torna disponibile
  • −5%Primo ordinefatto dall'app
  • Vedi in 3De sulla tua moto, in realtà aumentata
Scarica su App Store Disponibile su Google Play Download

Free shipping on orders over €100 · 14-day returns
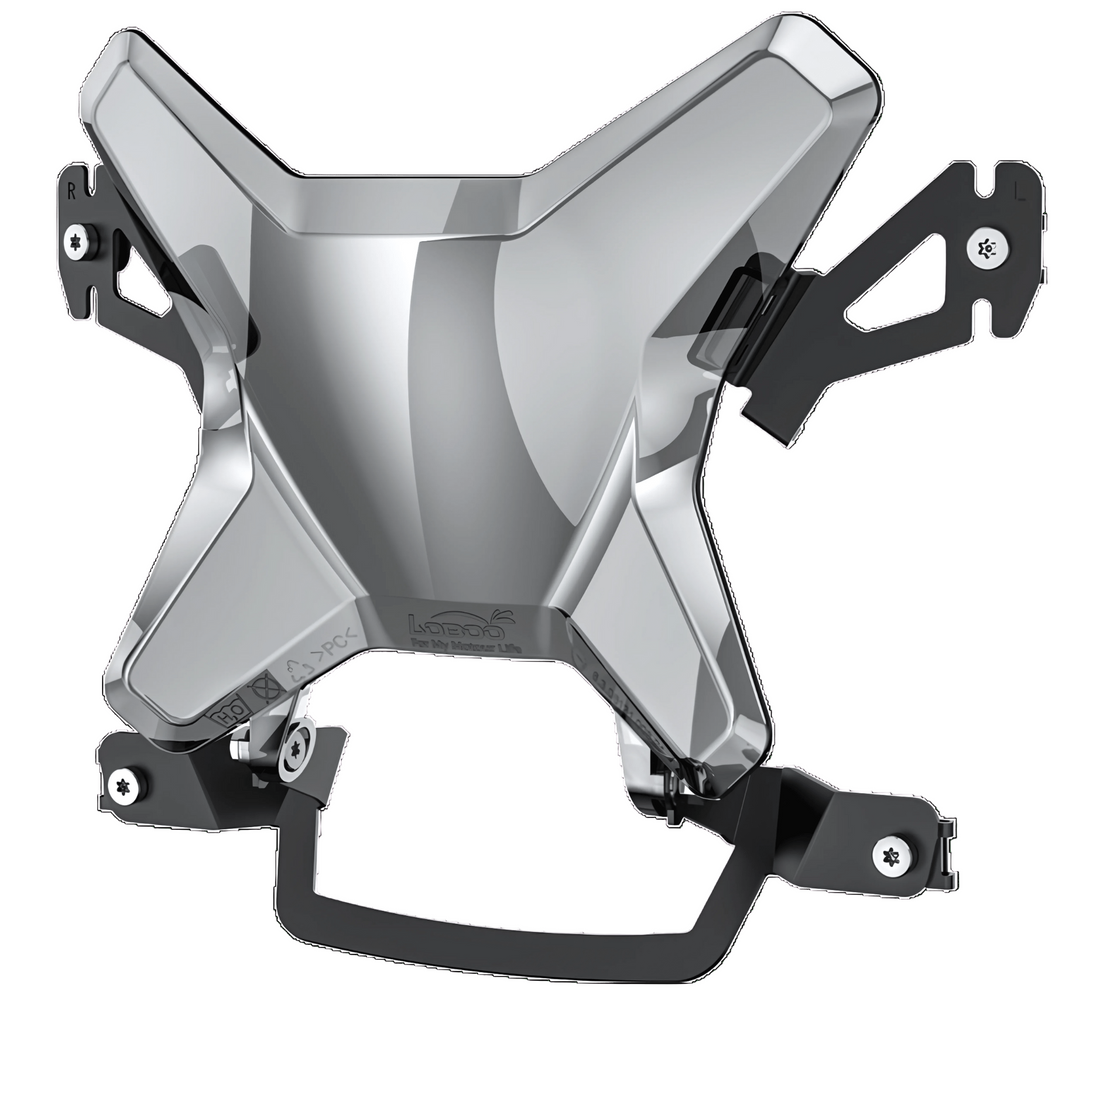
BMW R 1300 GS Headlight Guard - Endurrad.comBMW R 1300 GS Headlight Guard - Endurrad.comBMW R 1300 GS Headlight Guard - Endurrad.comBMW R 1300 GS Headlight Guard - Endurrad.comBMW R 1300 GS Headlight Guard - Endurrad.comBMW R 1300 GS Headlight Guard - Endurrad.comBMW R 1300 GS Headlight Guard - Endurrad.comBMW R 1300 GS Headlight Guard - Endurrad.comBMW R 1300 GS Headlight Guard - Endurrad.comBMW R 1300 GS Headlight Guard - Endurrad.comBMW R 1300 GS Headlight Guard - Endurrad.comBMW R 1300 GS Headlight Guard - Endurrad.comBMW R 1300 GS Headlight Guard - Endurrad.com
-10%Consegna in 2-3 giorni lavorativi
CDBH131 Code
R 1300 GS Motorcycle

Panoramica

In breve

Protezione dedicata al gruppo ottico Matrix LED della BMW R 1300 GS. Lente in policarbonato ad alta trasmissione luminosa, montata su una cornice che resta fissa alla moto: la lente si ribalta su cerniera magnetica e si pulisce senza attrezzi.

Disponibile in tre finiture: Trasparente, Light Grey e Chrome. Per la R 1300 GS Adventure serve la versione CDBH151.

Protects against expensive damage

the Matrix LED headlight on the R 1300 GS is among the most expensive parts of the bike.

Cleans without tools

the magnetic hinge is why this protector is actually kept clean, unlike screwed-on versions.

Polycarbonate, not acrylic

it scratches under stone impact, but does not shatter.

No drilling

it attaches to existing anchor points and is completely reversible.

Three finishes

Clear, Light Grey and Chrome, with the same protection.

Dal produttore LOBOO

Original LOBOO product, a brand specializing in adventure and touring motorcycle accessories. Official manufacturer documentation available upon request.

Leggi la descrizione completa

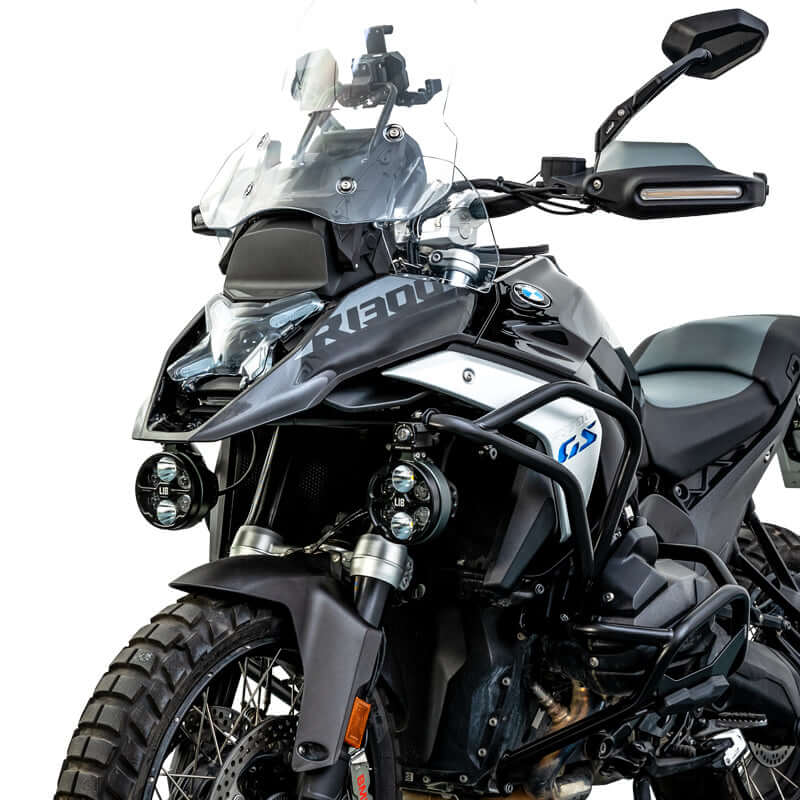
The LOBOO CDBH131 Headlight Protector places a polycarbonate screen in front of the BMW R 1300 GS's X-shaped Matrix LED headlight assembly. It's one of the motorcycle's most expensive components, and all it takes to damage it is a stone kicked up by the truck in front of you.

Opens with one hand: magnetic hinge

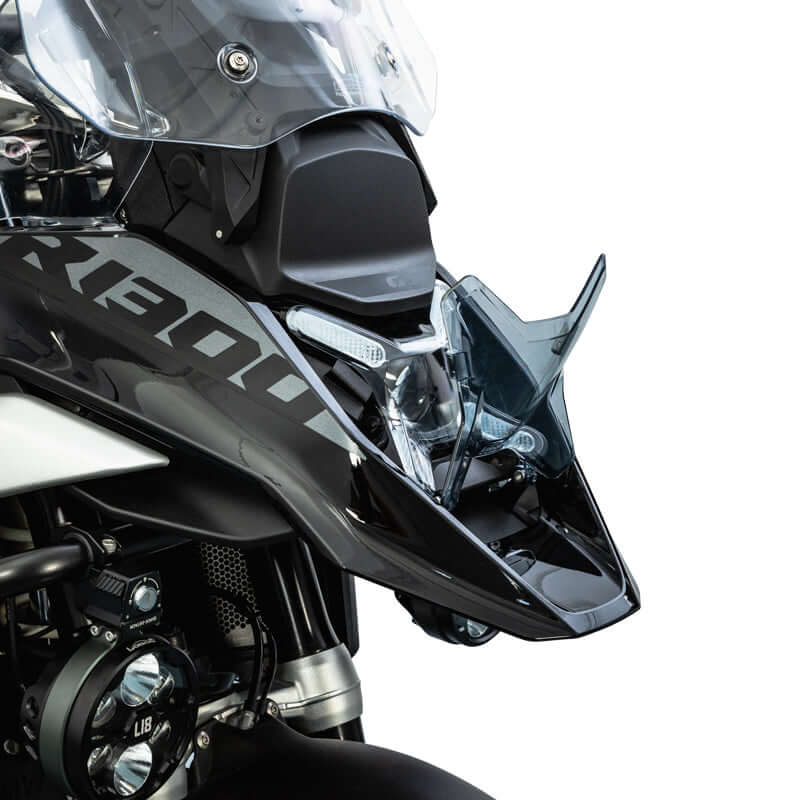
The frame stays attached to the motorcycle, while the lens flips up on a magnetic hinge. At the gas station, open it, wipe the headlight, and snap it closed again.

That's the real difference compared with bolt-on protectors. To clean those, you have to remove them with tools - and that's why nobody does. The result: insects and dust remain trapped between the screen and headlight all season, reducing light output without you noticing.

Polycarbonate, not acrylic

Acrylic is transparent, inexpensive, and used in most budget protectors. When struck by a stone, it cracks. Polycarbonate absorbs the energy of the impact without shattering: it gets scratched, but it doesn't split open. That's the same reason helmet visors aren't made of acrylic.

The lens has low optical distortion: in front of a Matrix LED, a screen that diffuses the light would undermine the optics you paid for with the motorcycle.

How to choose the tint

  • Clear - maximum light transmission, with protection that's practically invisible. It's the right choice if you ride at night on unlit roads.
  • Light Grey - smoked effect, a more aggressive appearance, while maintaining good light output.
  • Chrome - mirror finish with an amber reflection, the most distinctive aesthetically and the one that filters the most light.

If you mainly ride at night or outside urban areas in the dark, choose Clear and don't give it another thought: no colored finish can restore the light it removes.

Installation

It attaches to the motorcycle's existing mounting points, with no drilling required. LOBOO provides a dedicated installation guide, which we can send you before purchase if you want to assess the process.

When it's not the right product

If you have the R 1300 GS Adventure, this one won't fit: the front end and mounting points are different, so you need the CDBH151 version, which you'll find on a separate page. And if you're looking for a metal grille for serious enduro riding, this isn't it: it's a transparent screen designed for road use and fast gravel riding, not a rock cage.

Nella confezione

  • ✅ The original LOBOO headlight protector in the finish of your choice, complete with frame, lens, and mounting hardware.
  • 🔧 LOBOO installation guide: available upon request, even before purchase if you wish to assess the installation.
  • ⚠️ Only for standard R 1300 GS: does not fit the Adventure model, CDBH151 is required.
  • 🚚 Tracked shipping throughout Italy, with product inspection before dispatch.
  • 🛡️ 24-month legal guarantee of conformity for the consumer, with the claim process towards the manufacturer managed by us.

CDBH131 – polycarbonate lens – magnetic hinge – 3 finishes

How does it work, in detail?

The magnetic mechanism, the lens material, and what to expect in everyday use.

The R 1300 GS headlight cannot be repaired; it must be replaced.
01

The R 1300 GS headlight cannot be repaired; it must be replaced.

That’s why a windscreen makes sense on this bike: the headlight assembly is one piece, integrated into the front, and a stone hitting it at highway speed won’t polish out. The windscreen takes the hit instead and costs a fraction. LOBOO lists it for the BMW R 1300 GS from 2023 onward.

High transparency, minimal distortion
02

High transparency, minimal distortion

It's the question everyone asks before putting something in front of a headlight: how much light do I lose? The manufacturer claims high light transmission and minimal distortion, with performance close to that of the bare headlight. The official photo shows the beam of the R 1300 GS with the screen installed.

Opens with one finger, no tools needed
03

Opens with one finger, no tools needed

The zipper is magnetic: the screen flips forward, leaving the headlight accessible for cleaning without unscrewing anything. After a stretch of dirt road or a swarm of bugs, it takes thirty seconds, and that changes how often you actually do it.

Polycarbonate, not acrylic
04

Polycarbonate, not acrylic

The difference matters: LOBOO states that polycarbonate is more resistant than acrylic in harsh riding conditions. Acrylic is cheaper but brittle in the cold and cracks on impact, which is exactly what a headlight screen must withstand. Cleaning requires care, though: use water and mild detergent with a soft cloth, never solvents, or the polycarbonate will become cloudy.

Three finishes, same brackets
05

Three finishes, same brackets

Transparent, light gray, and chrome. Only the lens changes: the structure, metal brackets, and hardware are identical, so the choice is aesthetic rather than technical. The transparent option is the most neutral when the headlight is off, while the chrome is the most pronounced on the front end.

How the front end changes, finish by finish
06

How the front end changes, finish by finish

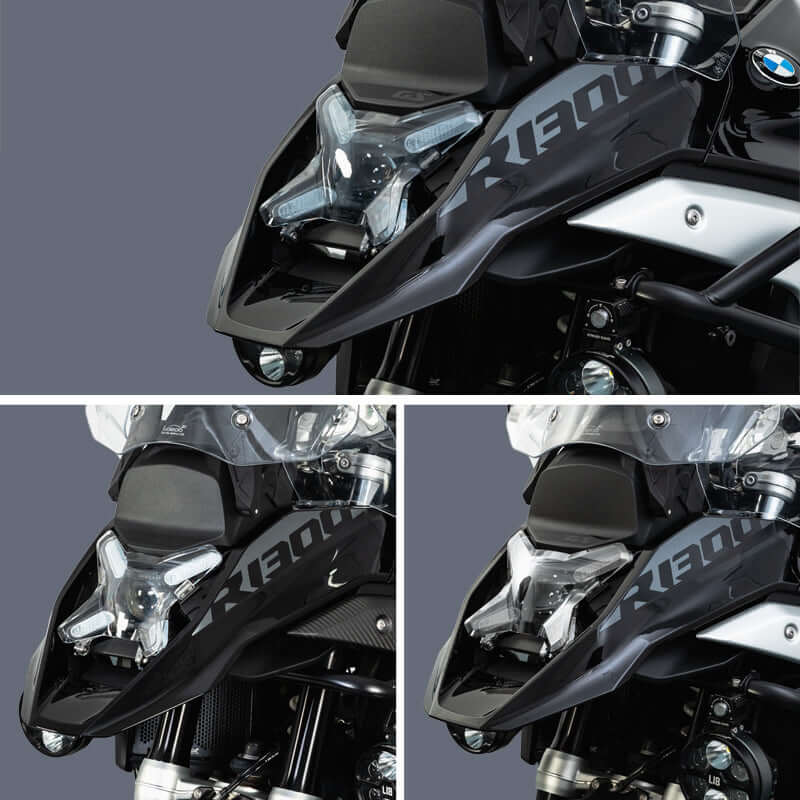
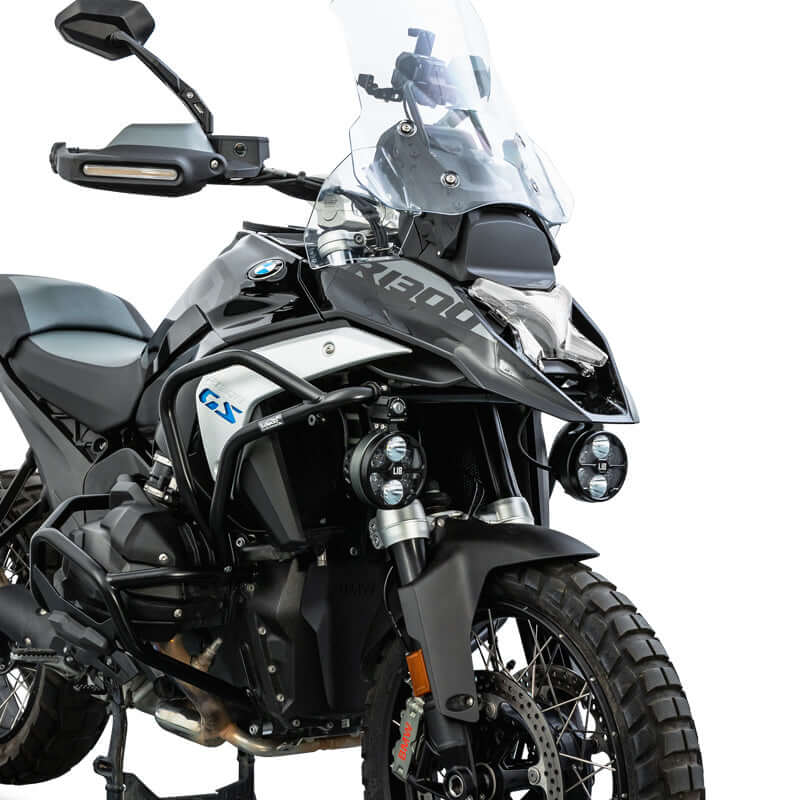
The same front end with the three lenses, photographed by the manufacturer from the same position and in the same lighting. This is the comparison you really need before choosing, because on a dark motorcycle the light gray disappears and the chrome stands out, while on a light-colored one the opposite happens.

What the manufacturer states
07

What the manufacturer states

The official LOBOO table: model CDBH131, PC material, finishes in transparent, light gray, and chrome, declared motorcycle BMW R1300GS from 2023. Weight and dimensions are not listed, so you will not find them written anywhere in this sheet: we do not estimate them.

The assembled bike
08

The assembled bike

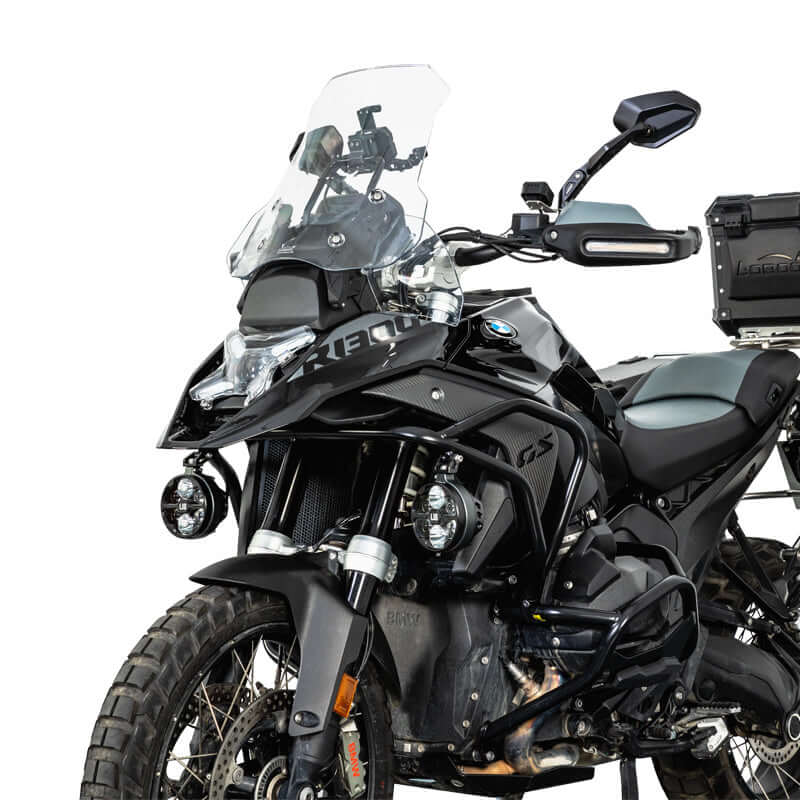
The screen follows the profile of the front fairing and does not protrude beyond it: it does not change the motorcycle's dimensions or interfere with the auxiliary lights mounted on the bars. Installation requires seven steps, including removing and reinstalling two fairing parts.

The details up close
09

The details up close

The metal brackets attach to the sides of the light assembly and remain hidden behind the screen profile. There are two, one right and one left, and they are installed first: the lens is attached last, at 3 N·m, using the Torx T25 key included in the package.

Dati dal manuale d'uso LOBOO

Specifiche tecniche

Tutti i dati

Product

Code
CDBH131 Headlight protection

Identification

Official name in the manual
Headlight Guard

Construction

Material
Polycarbonate Impact-resistant, shatterproof
Mechanism
Magnetic zipper Quick release: the lens opens with the frame mounted, without tools

Finishes

Colors
Three Transparent, Light Grey, Chrome

Compatibility

Motorcycle
R 1300 GS BMW from 2023 onward. The Adventure requires the CDBH151.

Structure

Staffe
Two, right and left, attached to the sides of the light assembly

Package contents

Complete itemized list
6 items for 12 pieces: 1 screen, 1 left bracket, 1 right bracket, 4 M5 nuts, 4 M5×12 screws, 1 T25 Torx key

Assembly

Tightening torque
3 N·m On M5×12 screws
Tool
T25 Torx key, included in the package
Illustrated steps in the manual
7 2 for dismantling, 3 for installation, 2 for restoration. No drilling

Maintenance

Cleaning
Water and mild detergent with a soft cloth, never solvents

Undeclared data

Weight and dimensions
Not declared by the manufacturer

Specifications declared by the manufacturer LOBOO. If you have any doubts about compatibility with your model, please contact us before purchasing.

Prima di ordinare

Montaggio e requisiti

Come si monta

  1. Distinta di 6 voci per 12 pezzi: schermo, staffa sinistra, staffa destra, 4 dadi M5, 4 viti M5×12 e la chiave Torx T25.
  2. Coppia di serraggio: 3 N·m. È il valore più basso fra le protezioni a catalogo dopo i tamponi paramani, ed è voluto: sono viti M5 su staffe sottili.
  3. Attrezzo: chiave Torx T25, inclusa nella confezione. Non serve altro.
  4. Le staffe si fissano ai lati del gruppo ottico, poi lo schermo si aggancia sopra: è l'ultimo passaggio, quando tutto il resto è già in posizione.
  5. Le parti della carena rimosse nei primi due passaggi tornano al loro posto alla fine.
Istruzioni complete e note di sicurezza

Sette passaggi illustrati sul manuale, senza forature: due di smontaggio, tre di installazione e due per rimettere a posto le parti originali. Lo schermo non si appoggia al faro, ha due staffe proprie, una destra e una sinistra.

  • Distinta di 6 voci per 12 pezzi: schermo, staffa sinistra, staffa destra, 4 dadi M5, 4 viti M5×12 e la chiave Torx T25.
  • Coppia di serraggio: 3 N·m. È il valore più basso fra le protezioni a catalogo dopo i tamponi paramani, ed è voluto: sono viti M5 su staffe sottili.
  • Attrezzo: chiave Torx T25, inclusa nella confezione. Non serve altro.
  • Le staffe si fissano ai lati del gruppo ottico, poi lo schermo si aggancia sopra: è l'ultimo passaggio, quando tutto il resto è già in posizione.
  • Le parti della carena rimosse nei primi due passaggi tornano al loro posto alla fine.

Non stringere a fondo mentre monti: presenta tutti i pezzi, verifica che lo schermo sia centrato sul faro e solo alla fine dai i 3 N·m in sequenza. La cerniera magnetica resta libera di aprirsi per la pulizia.

Installation and maintenance

  • Secure to existing anchor points, without drilling: the frame stays on the motorcycle, the lens opens on the magnetic hinge.
  • Take advantage of the hinge: open and clean the screen and headlight regularly. Trapped dust and insects between the two reduce light output more than you imagine.
  • Use water and a neutral detergent with a soft cloth. Avoid solvents, alcohol, and rough cloths: they will irreversibly dull the polycarbonate.
  • A tinted lens reduces the light emitted. If you often ride at night on unlit roads, choose the Clear lens.
  • After a significant impact, check the lens: a crack or extensive hazing should be evaluated, as they alter the light beam.

How to choose the colour:

  • Clear: does not alter the light output, the most neutral choice and recommended if you drive at night on unlit roads.
  • Light Grey and Chrome: greater aesthetic impact, but filter part of the light.

This protector is for the standard R 1300 GS. For the R 1300 GS Adventure there is a dedicated version, on a separate page: the headlamps and attachment points are different.

Recensioni

5,0
★★★★★1 recensioni
5★1
4★0
3★0
2★0
1★0
Tsvetan Trentchev05/06/2025
★★★★★

Protezione faro BMW R 1300 GS

Domande frequenti

Le domande che ci fate più spesso

Does it also fit the R 1300 GS Adventure?

No. The CDBH131 is designed for the front of the standard R 1300 GS and does not fit the Adventure: the front end and mounting points are different. The Adventure requires the CDBH151 version, which you can find on a separate page. If you’re not sure which of the two you have, send us the frame number or a photo of the front, and we’ll tell you which one it is before you order.

Which screen color should I choose?

The Clear option does not alter the headlight’s light output and is the most neutral choice. Light Grey and Chrome have a greater visual impact but filter out some of the light: if you often drive at night on unlit roads, consider Clear.

Does it reduce the headlight’s brightness?

Any screen placed in between absorbs some of the light: it would be misleading to tell you otherwise. With the Clear lens, the loss is minimal and imperceptible while riding, because optical polycarbonate is specifically designed for high light transmission.

With Light Grey, and especially Chrome, the reduction is real and visible: these are aesthetic choices. If you ride many miles at night on unlit roads, choose the Clear lens and don't think twice.

How do you clean the headlight with the guard installed?

There is no need to take anything apart. The frame stays attached to the motorcycle, and the lens flips up on a magnetic hinge: open it with one hand, wipe the headlight, and snap it shut again. It is what you need to do at every gas station stop in summer.

That is also the key difference compared with screwed-on protectors: to clean those, you have to remove them with tools, and in practice no one does. As a result, gnats and dust remain trapped between the screen and the headlight all season, reducing the light output without you noticing.

Do you need to drill or modify anything on the motorcycle?

No. The brackets attach to the motorcycle’s existing mounting points on the front, with no drilling or cutting. Installation is completely reversible: if you sell the motorcycle, you can remove everything without leaving a trace. LOBOO provides a dedicated installation guide, which we can also send you before purchase if you’d like to assess the process.

What happens if I get hit hard by a stone?

The lens is made of polycarbonate, the same material used for helmet visors: under impact, it may get scratched or, at worst, crack, but it will not shatter into fragments like the acrylic used in inexpensive guards. It is the system’s sacrificial component, and that is precisely its purpose: to take the impact instead of the optical assembly.

After a significant impact, hold it up to the light: a crack or extensive clouding can alter the light beam, at which point the lens should be replaced.

Avvisami quando disponibile

Ti scriviamo appena BMW R 1300 GS headlight protector (Light Grey) torna disponibile.

  • 5 stars: 1 (100%)
  • 4 stars: 0 (0%)
  • 3 stars: 0 (0%)
  • 2 stars: 0 (0%)
  • 1 star: 0 (0%)
T
Tsvetan Trentchev

Protezione faro BMW R 1300 GS

l
luca

E' possibile il montaggio su gs 1300 adv ?
ho visto sul sito americano che lo propongono anche per il gs 1300 adv, ma ne vorrei essere certo. Grazie Luca

Endurrad®

Buongiorno può trovare la "Protezione faro per BMW R 1300 GS ADVENTURE", nella sezione dedicata agli accessori per BMW R 1300 GS Adventure.
Ecco il link della protezione faro dedicata alla sua moto (BMW R 1300 GS ADVENTURE)
https://endurrad.com/products/protezione-faro-per-bmw-r-1300-gs-adventure